Setup Menu
First....Prev....Next.....Last
Setup Menu
Most items on the Setup menu are used infrequently, some will only be used when the system is initially installed, others are topics or groups of topics in their own right. Follow the links in the list below for more details.
Company Details
Fees Schedule
Portfolio Details
Inspection Codes
Inspection Fee Schedule
Standard Documents
Standard Text
Stationery Format
Getting Started
.....First Period Details
.....Landlords Opening Balances
.....Suppliers Opening Balances
.....Tenants Opening Rent Status
.....Landlords Opening Balances Report
.....Tenants Opening Rent Status Report
.....Suppliers Opening Balances Report
Clean Up
Preferences
Landlord Opening Balances Report
This prints the entries placed in the first B/Fwd record by the Landlord Opening Balances program and ignores any transaction entries so the entries can be checked against your old system. Correct any errors and check again.
Tenant Opening Rent Status Report
This prints the entries placed in the first B/Fwd record by the Tenants Opening Rent Status program and ignores any transaction entries so the entries can be checked against your old system. Tenants whose paid up date is earlier than the opening date of the first period will have Rent Inv records added covering the gap between the Paid to date and the B/Fwd record.
Supplier Opening Balances Report
This prints the entries placed in the first B/Fwd record by the Supplier Opening Balances program and ignores any transaction entries so the entries can be checked against your old system. Correct any errors and check again.
Preferences
The Preferences sub menu displays a series of tabbed pages which allow you to set the following items.
Appearances Tab
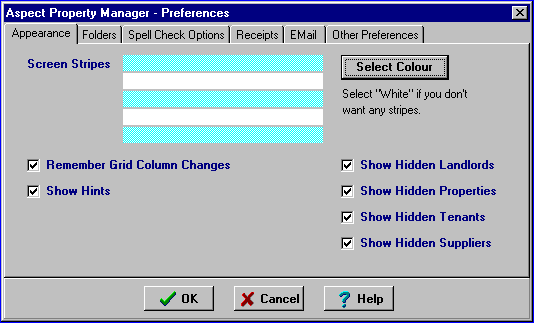
Screen Stripes
You can choose to have alternate lines on the transaction grids display in a colour of your choice as an aid to following a transaction line. If you do not want alternating coloured line choose White as the candy stripe colour. Do not use yellow, red or black. If you have changed the standard Windows colour set up you will have to interpret any colours in these help instructions.
Remember Grid Column Changes
The grid columns in the transaction grids may be re-ordered to suit your preference by dragging the column headings and if this box is ticked the column order and width will be retained from one session to the next. When unticked the column order will revert to the default order.
Show Hints
If a tick is against Show Hints a brief hint will appear for a second or two in a yellow box when the mouse pointer moves on to various parts of the screen displays. To re-display the hint move the mouse pointer off then back on to the item. Remove the tick to turn Hints off .
Folders Tab
This page shows the directory path for the various files used by the system. Under normal circumstances these paths should not be altered. If you do alter them make sure you have a full back up beforehand and make a note of the original path. Paths in red text are invalid.
Spell Check Options Tab

The options portion of this screen is also available from the Spelling window when Spell Check finds a misspelt word. See the Word Processing Features topic for further discussion.
If you want to prevent all "non-dictionary" street, suburb or city names showing as errors when checking the spelling, tick the "Use Property Addresses" box and the address names will be checked against the property addresses.
Receipts and Banking Tab
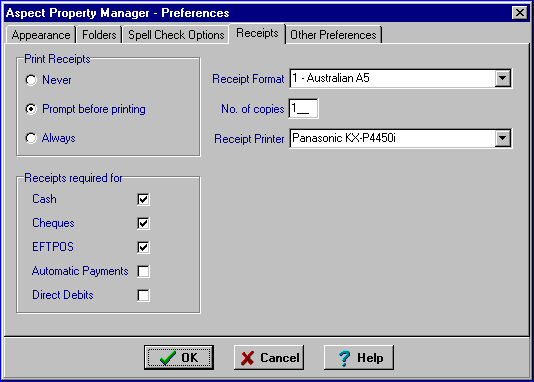
This tab is used to establish whether receipts are to be printed by the Aspect Property Manager, the receipt format to use, which printer to print them on and how many to print. The receipt prints directly to the printer selected without the preview option available with reports and letters.
Currently the system has only one style of receipt suitable for Australian use and designed to print on A5 stationery. Other formats can be added as requested.
Email Tab
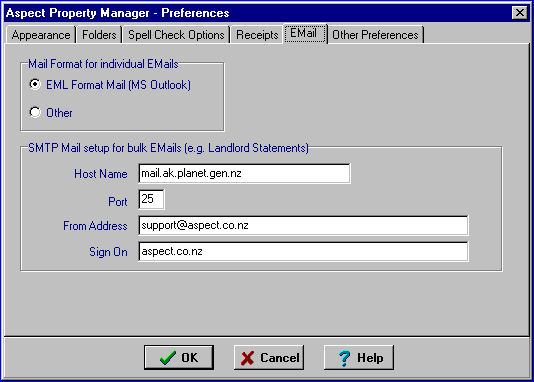
The Email Set Up steps must be complete before any email can be sent from the Aspect Property Manager.
Correspondence Tab
This option allows the options to save letters, emails, faxes, SMS messages to be pre-set to meet the requirements of individual organisations. See Saving Documents for more details
Other Preferences Tab
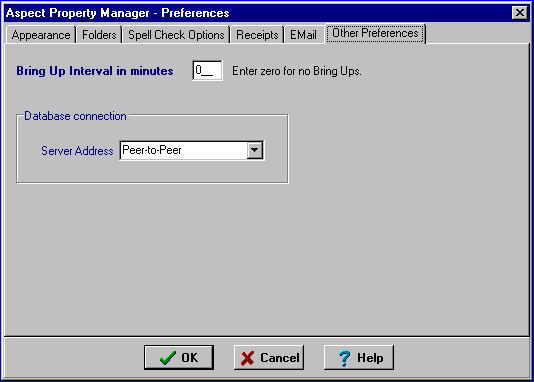
Check Bring Ups every ... minutes
Use this to set the time delay for the automated Bring Up system. Within a minute of logging into the system the Bring Ups screen will appear. When the screen is closed with un-actioned Bring Ups the screen will re-appear after this period which is set to 60 minutes on installation. If you don't want Bring Ups to appear set the time to zero.
Database connection
This entry is only used in a Client/Server installation. It has nothing to do with email or emailing landlord statements.